
Last week I gave my first online tutorials in which I needed to scribble on a whiteboard and show the students their exam scripts from last term, which had been posted to my home. To solve both of these problems, I spent a bit of time figuring out how to share my iPad and iPhone screens within Microsoft Teams running on my Apple MacBook. For anyone wanting to do the same, I thought I’d share what have I found.
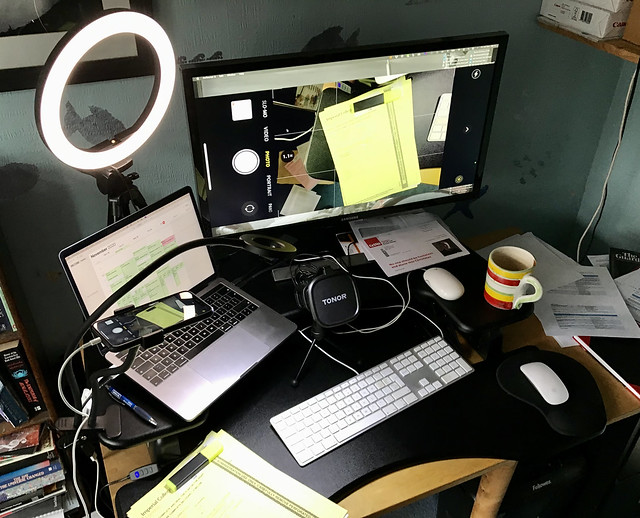
Lights, laptop, action – getting ready for a tutorial
The solutions turn out to be relatively straightforward; and some will likely work with other video-conferencing programmes, like Zoom, which also permit screen-sharing.
The easiest solution: 100% Teams
First, the simplest solution works just using MS Teams and doesn’t require any additional software. Once you have joined or started the meeting in Teams on your laptop, the trick is then to join the same meeting via the Teams app on your iPad (and/or iPhone).
Then, from your iPad, choose ‘Share’, then ‘Share screen’, and finally click ‘Start Broadcast’. The app will count down from three before the screen sharing starts and should appear on your laptop screen.
At that point, on your iPad you can switch to whatever app you want to use. As a whiteboard, I find the MS PowerPoint app on the iPad pretty handy. You can use the Draw menu (and an Apple Pencil) to access pens and an eraser tool. The advantage of PowerPoint is that you can also prepare material in advance of the tutorial and scribble annotation on that while teaching.
Since you can share the screen from any iPad app in MS Team, you can also turn your iPad or iPhone into a video camera or overhead projector. That’s what I’ve done in the photo above using an adjustable iPhone holder that clips to the desk. A good tip if you are doing this is to have the iPhone camera in photo mode (for the highest resolution). It also a good idea to turn the ‘Autolock’ delay to its maximum value (5 min), since that reduces the likelihood that the screen will go blank. Just remember to touch the screen now and then (e.g. to update the focus point) to keep the iPhone active.
Alternative 1: using Quicktime
If for any reason you don’t want to be signed in to the MS Teams meeting from more than one device, another way to share your iPad (or iPhone) screen is to use Apple’s free QuickTime app. Thanks to @jr_pritchard for pointing me to the Business Insider article that shows you how.
First, plug your iPad into the laptop using a USB cable. Then on the laptop, launch QuickTime and from the File menu, select ‘New Movie Recording’. QuickTime will default to using the webcam built into your MacBook but if you click on the little down arrow next to the red record button, you can choose your iPad as the camera. The QuickTime window on your laptop then shows the feed from your iPad. All you need to get this into MS Teams is share the screen that has the QuickTime window in it.
As with the first method, you can switch the iPad to whatever app you like – to PowerPoint if you want a whiteboard or to the iPad camera if you want to use it an an overhead projector.
Alternative 2: using Reflector 3
Reflector 3 is an app that allows you to use the AirPlay capability built into iPads and iPhones to share their screens with your Apple MacBook. It offers essentially the same functionality that you get with the QuickTime solution described above but offers a little more flexibility (e.g. with screen size and orientation) and doesn’t need a cable. The downside is that the app costs about £17, but you can try it free for 7 days to see if it’s the solution for you.
Alternative 3: using Sidecar
Apple recently introduced a tool called Sidecar (located in the System Preferences), which allows you to covert your iPad into a second monitor. This is handy if, like me, you sometimes travel with your MacBook and iPad as it gives you extra monitor space on the road. You can use the ‘Displays’ tool in the System preferences to set up your preferred screen arrangement. By default, I think Apple puts the iPad screen immediately to the left of your MacBook Screen. For more information on the capabilities and equipment requirements of Sidecar, check out this AppleInsider article.
With Sidecar running, you can then launch PowerPoint from your MacBook and drag the window over onto the iPad screen. From here, you can use the tools in the Draw menu to scribble or erase till your heart’s content. To share this within a Teams meeting running from your laptop, when you choose ‘Share screen’ you need to make sure to pick the screen corresponding to the iPad in the selection offered. You should also be able to select just the PowerPoint window, which I would recommend maximising to fill the iPad screen.
In my experience, although this works and is a free and cable-free option, the responsiveness of PowerPoint was less than in the set-up that allow you to run the PowerPoint app on your iPad. But, different strokes for different folks, as we scribblers are wont to say.
Anyway, hope that was helpful. Best of luck with your online teaching!
Finally, this blogpost started out as a thread on twitter to which many people contributed. Particular thanks to @jr_pritchard, @dasaptaerwin, @ArttuRajantie, @DavidDye9, and @psobolewskiPhD.


Useful tips there, Prof. Am sharing widely. And there I was thinking that a sidecar was a cocktail best enjoyed when riding on a motorcycle. I shall now consider myself informed.
Thanks Henry – and a warm but belated welcome back to the blogosphere!
I’ve not been far away. Just couldn’t find a place to park.
I haven’t used Teams, but using Zoom you can share the screen of an iPhone or iPad via Airplay without any additional software/mechanism, which works very well for seminars where you are noting down audience response on the screen using an Apple pencil.
Interesting and good to know. At my university Teams is supported whereas Zoom is not, alas.